Sirius Hacking Part 2 - System Internals
January 2023 (2205 Words, 13 Minutes)
Disclaimer
All of the following information is based on my own research and applies to the HP OfficeJet Pro 8715 with the D9L18-80076 REV C WEBER BASE board and weber_base_vr2_pp1_WBP2CN1848AR_nbx_signed firmware revision.
This post is not meant as a reverse engineering introduction, it’s meant to help other researchers get a start in hacking this device/other devices running the same OS.
The hardware
There are two cores on the ASIC, one big endian ARM Cortex-R4 core running on 150mhz and one little-endian ST231 (a processor architecture developed by HP and STMicroelectronics) core named pie.
These two cores can communicate with each other, though I haven’t figured out the purpose of pie yet.
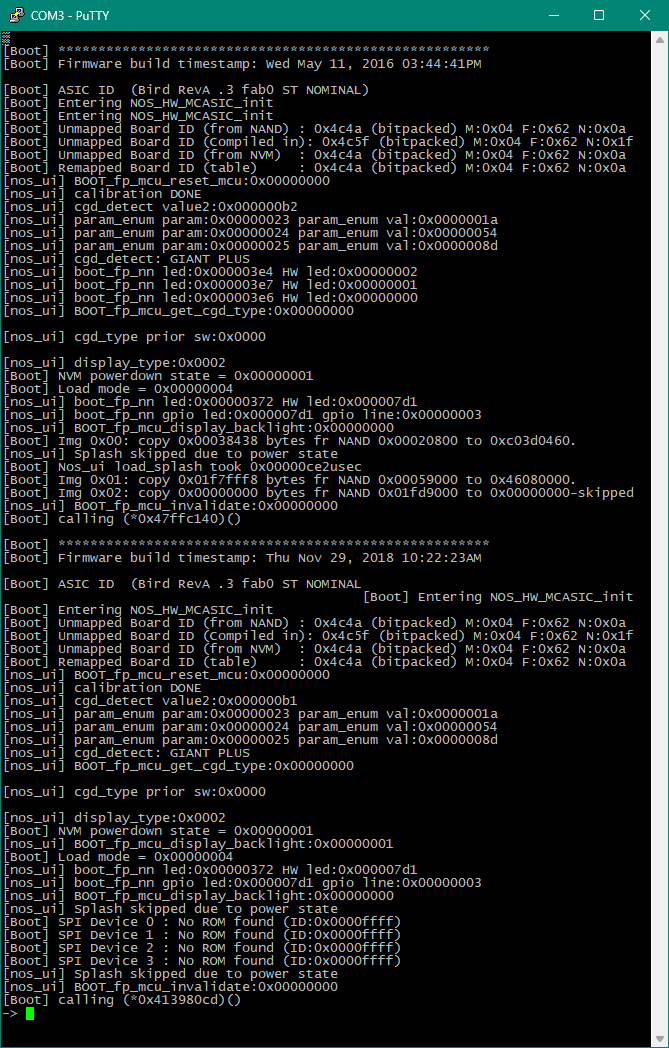
Looking at the output of the Serial Shell while the device boots suggests that the name of this specific ASIC is Bird.
The board also has 128 MB of SLC NAND flash memory (Macronix MX30LF1GE8AB-TI) as well as 128 MB of DDR3 SDRAM (Winbond W631GG6KB-15).
The front panel contains a 320x240 GiantPlus LCD screen and a capacitive touchscreen that’s bigger than the screen. This touchscreen is also used to implement the soft buttons.
There’s also a WiFi module called Ultra_Spectra/SDGOB-1392 which uses a Broadcom BCM943143EDSBP.
This module uses SDIO to communicate with the board and its firmware/config resides in the ROM filesystem.
The operating systems
Both of these cores run Sirius, a custom OS built on top of another RTOS.
The ST231 core runs on OS21, a RTOS by STMicroelectronics.
The ARM core runs on ThreadX (specifically ThreadX ARM9/Green Hills Version G5.1.5.0 SN: HP_RC2_INTERNAL_USE_042007), an embedded real-time operating system by Express Logic which was purchased and open-sourced by Microsoft in 2019. Being able to match the disassembly with the source turned out to be very useful while reverse engineering the firmware.
The firmware uses Treck as its TCP/IP stack.
I’ve created an IDA loader for Sirius flash images, it sets up all of the segments, decompresses compressed segments, and handles the memcpy segments.
Sirius Modules
While reverse engineering pretty much any functionality, you’ll quickly notice lots of indirect calls. These are likely to be exports of modules.
The .module segment contains an array with pointers to all module entries.
 (This is the
 ggw module definition)
Modules can be libraries, components, or a hybrid of both. They can export functions and other modules can import those functions. They have a list of tasks as well as a list of imported and exported events. They also have an ID which is used in the import/export mechanism.
Each module has an important function in its definition which I’ve called GetFunctionTable.

It returns a pointer to the FunctionTable which in itself contains pointers to functions such as Init, Start, GetExport, SetImport etc.

After ThreadX booted, Sirius starts to initialize the modules. It does a bunch of error checking, initializes internal structures, and links all of the imports and exports together.
It then starts the modules by doing the following for each entry:
- Calling the
Initfunction - Handling imports/exports
- Creating a thread for each task with a predefined priority and specified stack size. These are started automatically and kept track of in a list.
- Calling
early_start,Start,StartComplete, andStartComplete2
Each import/export has the same structure, they have a type (VTABLE and DIRECT), an IID, which I suppose stands for interface id, as well as an Enum. Exports additionally always specify a module id whereas imports only specify them if there are multiple exports with the same IID.
Handling imports/exports
Let’s resolve the imports of the ggw module to give you an idea of how it works.

Searching for the first IID (0x10D47), we see that it’s defined in the ds2 module and has an Enum value of 0x1F:
Sirius first calls the GetExport function of the module that exports this IID (in this case ds2_GetExport), providing the Enum of the export definition.
This function subtracts 0x1F from the passed Enum value and returns the element located at that index from the ds2_ExportTable array. Since the export’s Enum, we are interested in is 0x1F, the function just returns the first element of the ExportTable.
Sirius then calls the SetImport function of the module that imports this IID (in this case ggw_SetImport), providing the enum of the import (0xD8) as well as the returned element of the ExportTable.
This function works similarly to the GetExport functions, except that it stores the passed element to the index (the passed Enum minus 0xD7) in the ggw_ImportTable.
Here’s some pseudocode illustrating the process:
void *ds2_GetExport(int exportEnum)
{
    return ds2_ExportTable[exportEnum - 0x1F];
}

void ggw_SetImport(int importEnum, void *value)
{
    ggw_ImportTable[importEnum - 0xD7] = value;
}

void *val = ds2_GetExport(0x1F);
ggw_SetImport(0xD8, val);
Even though this is the first import definition, it’s the second import in the ImportTable since 0xD8-0xD7 equals 1.
We can repeat this logic for the remaining entries and create a structure in IDA to then set the type of the ggw_ImportTable to that structure.
| ImportTable index | Enum | IID | Exported in module |
|---|---|---|---|
| 0 | 0xD7 |
0x10E84 |
conn_mgr |
| 1 | 0xD8 |
0x10D47 |
ds2 |
| 2 | 0xD9 |
0x10DA0 |
nca |
| 3 | 0xDA |
0x10E5A |
COMP_IO_SOCKET_MGR |

Turning this:
 Into this:

We still don’t know what functions are being called though.
To understand this, we have to know what the ExportTables contain.
As you can see, it’s pointers that point to pointers of a bunch of other function pointers.
We can now create another struct in IDA representing these function pointers and set all of the fields to void*:
Now we apply this structure:
Of course, we still have to reverse these functions and give them, as well as the fields in the struct, proper names.
To get some nice decompiler output, we set the type of conn_mgr_10E84 in the ggw_ImportTableStruct to a pointer to a pointer of the created struct:
 This turns the decompiler output from earlier to this:

All modules I’ve looked at work in the same way, the only difference being the number that’s subtracted from the Enum in the GetExport / SetImport functions.
However, this logic does not apply to imports/exports with the DIRECT type. I haven’t looked much into them, but I suppose that these are just statically linked.
To make this task easier, I’ve created an IDA script that defines all of the modules. It labels everything, creates functions for the tasks, and declares the module’s FunctionTable functions. You still have to resolve the imports yourself though.
Serial Shell
While taking a look at the board of the printer, I noticed two Serial headers (labeled SERIAL0 and SERIAL1) consisting of four pads. This is an indication of UART.
Lots of embedded devices have some sort of UART shell, oftentimes they are disabled or only provide limited functionality though.
Using a multimeter to take a look at the voltage and the continuity test to find the ground pad, I was able to figure out the following pinout:
 Note that I’m not responsible for any damages if this pinout doesn’t match your board revision.
I then soldered a total of five breadboard wires with female headers to the two TX pads, the two RX pads, and one to any of the two GND pads (since it’s the same ground plane anyway).
I connected the wires to a USB-to-UART bridge like this:
RXon the board toTXon the bridgeTXon the board toRXon the bridgeGNDtoGND
Afterward, I was expecting lots of trial and error trying to figure out the baud rate, but to my surprise the first baud rate I tried worked!
I was greeted by the following after setting it to 115200 and turning on the printer:
Trying undefined commands yields error: I don't understand. By searching for that string in the firmware, I quickly identified the function responsible for adding commands and thus I found all commands.
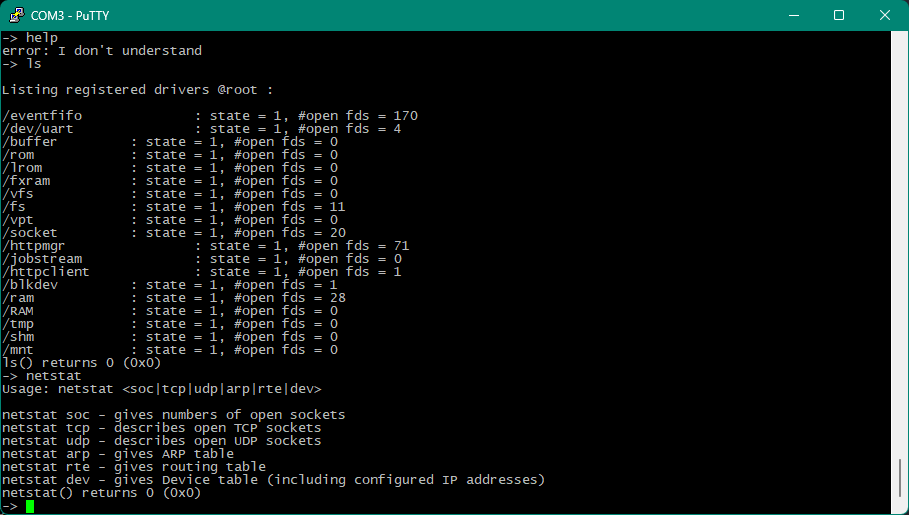 Running some commands
Unfortunately, there aren’t many commands, and those that exist don’t seem too useful.
There are commands to display and modify memory and even call arbitrary functions. These aren’t added though when the printer is in the “SecureBoot” mode:
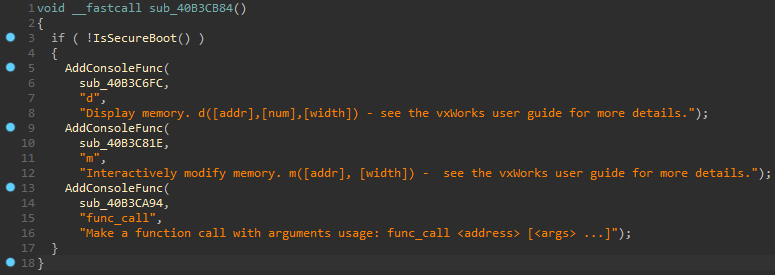 Note that even though these commands mention
 vxWorks, another RTOS, I didn’t find any other indication of it
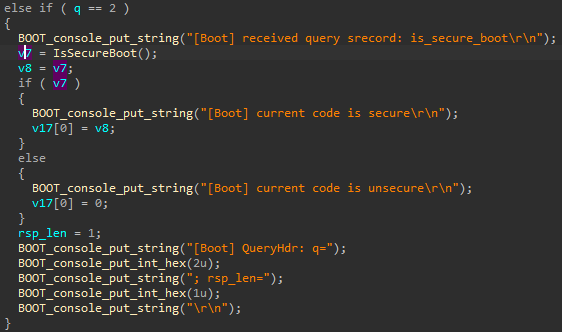
I’ve named it this way because the code calls a function and only adds these commands if it returns false. This function is also called in a bunch of other places, one function of them is responsible for parsing srecords and calls this IsSecureBoot function like so:
What’s great about this shell is that it also returns crashdumps, returning the type of crash, the content of all registers, and a stack dump:
Looking at the code some more, I kept seeing references to a lot more commands.
Trying to run them as is, returned the error: I don't understand error again though.
It turns out that these are so-called Underware/udw commands.
Underware
I have never heard this term before and at the time ChatGPT was just released, so I asked for a definition:
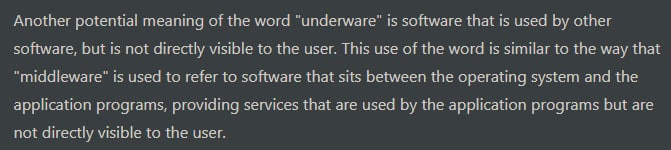
This is quite fitting, it’s basically all of the software that turns this device into a printer and not just some generic device.
I found a system like function that invokes these commands.

Since I was getting errors when trying to invoke these commands over the shell, I thought that they were “internal” to the system.
However, I kept digging and soon found the udws and udws_rpc shell commands.
These allow you to specify some command and optional arguments to that command.
udws_rpc runs underware commands on the pie core (Remember, it also runs Sirius).
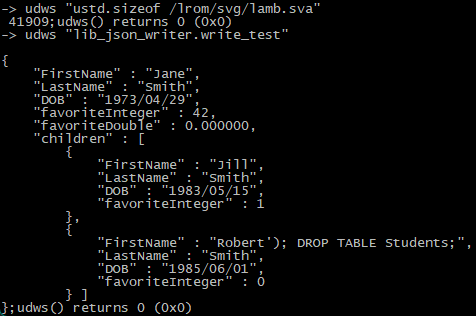 Running some example commands, nice easter egg btw
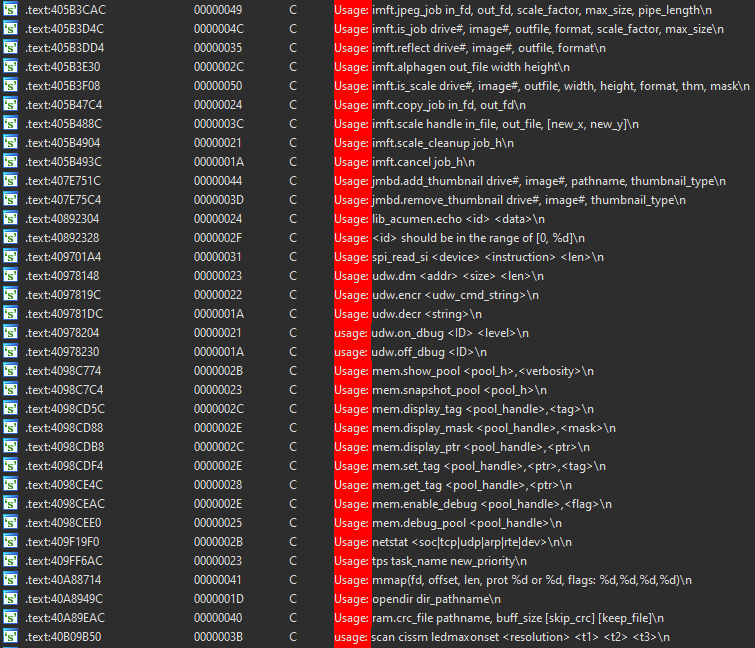
I was trying to find all of the command definitions to figure out what sort of functionality was exposed, but I kept seeing weird strings next to normal commands:
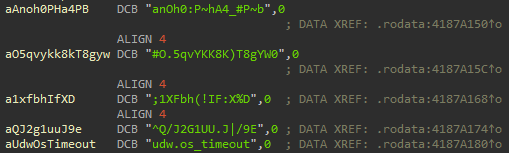
It turns out that the developers decided to hide some commands by encrypting them.
Luckily, there are commands to decrypt/encrypt commands, named udw.decr and udw.encr respectively.
There are a lot of commands, and decrypting every single one of them over the shell would take a while. There actually is a help shell command as well as the udw.cmds underware command that lists every command there is, but these aren’t enabled when the device is in the SecureBoot mode.
I was about to reverse the encryption, but I soon found another command udw.iter_get_next. This command iterates through all underware commands and returns their names. Here’s a list of all of them as well as all pie underware commands.
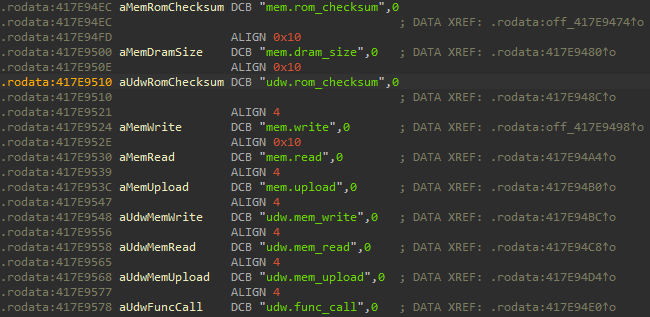
I started digging to find useful commands and eventually came across photo_hw.read and photo_hw.write.
These commands straight up allow you to read/write 1/2/4 bytes from/to any memory address, albeit as a signed integer so you have to do some conversion.
I suspect that this is an oversight because I also found the following mem commands that are again only added when SecureBoot is disabled.
I’ve created a python script which wraps some of the shell’s functionality, allowing you to, among other things, read/write arbitrary memory, dump the nand and even execute code.
The next part of this series explains how I got ROP and code execution using the photo_hw.write command.